
A Step-By-Step Guide to Making Loop Vent
Making a plumbing loop vent at home is easier, but to avoid any potential hazards it is very crucial to follow all the steps correctly. Now let’s dig into how to make a plumbing loop vent at home. Following are your A-Z step-by-step guidelines to make a loop vent from scratch:
Step 1: Gather Materials
At the beginning of the process, gather all the essential tools and materials listed below. It’s better and more convenient if you have everything on hand before you start the process. Also, before you start, don’t forget to wear your protective gloves and goggles.
For making loop vents at home, you will need some essential tools that a professional plumber uses while working on your home. Here is the list of essential tools and materials:
- Measuring Tape
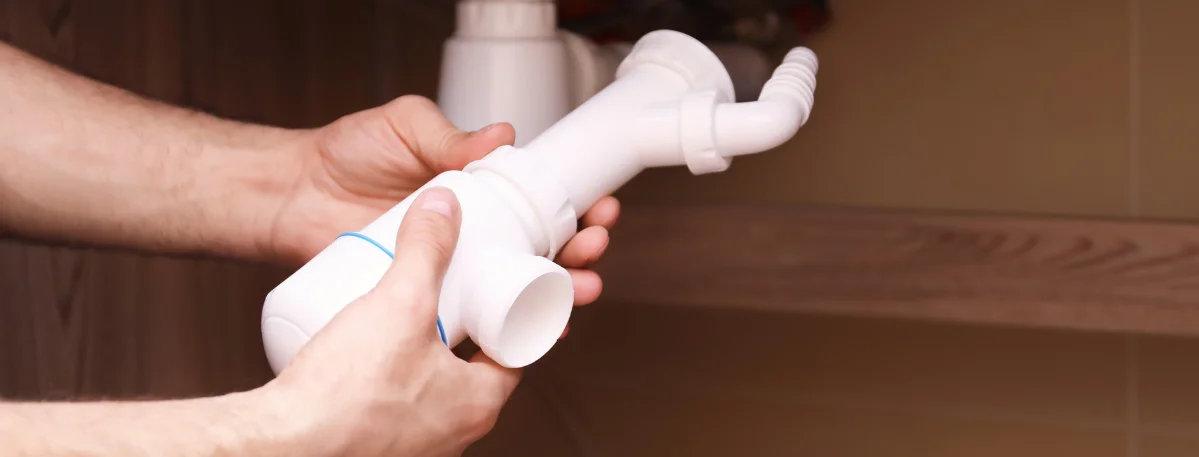
- Vent Piping (Made Of PVC)
- 45-degree and 90-degree Elbows and Wyes
- PVC Glue or Adhesive Tape
- Vent Pipe Extensions
- Couplings and Adapters
- A Hacksaw
- Primer and Cement
- Sandpaper
- Sanitary Tee
- Protective Gloves and Goggles
Step 2: Pick The Correct Size of PVC Pipe
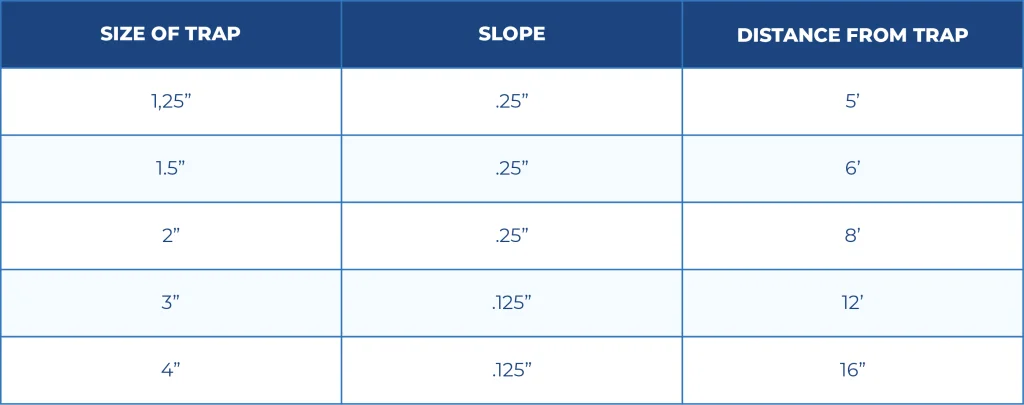
It is important to pick the right size of pipe. The pipe’s size is determined by the size of the trap and its slope. According to the International Code Council, the following sizing guidelines for your circuit ventilation system:
Step 3: Cut Pipe to Length
When assembling a plumbing loop vent, it is essential to get the pipe length just right. Because it ensures that everything fits properly and that there are no unexpected leaks later. When it comes to cutting pipe, the golden rule is to measure twice and cut once. Measure your pipes from end to end, including any bends or turns. Adjust as needed until everything fits perfectly for your plumbing setup. Mark where you need to cut with a marker or pencil once you have your measurement. Now, safely use a hacksaw, miter saw, pipe cutter, or rotary cutting tool to accurately cut the pipe.
When working with plastic pipes (such as PVC or CPVC), a different approach is required. For the best results, cut PVC at a 45° angle and CPVC at a 30° angle. After you’ve made your cuts, use sandpaper to smooth out the edges. This ensures that everything is properly sealed and that there are no leaks in the house. Simple and effective cuts will reward you with a plumbing loop vent that runs smoothly.
Step 4: Attach Adapters and Tees
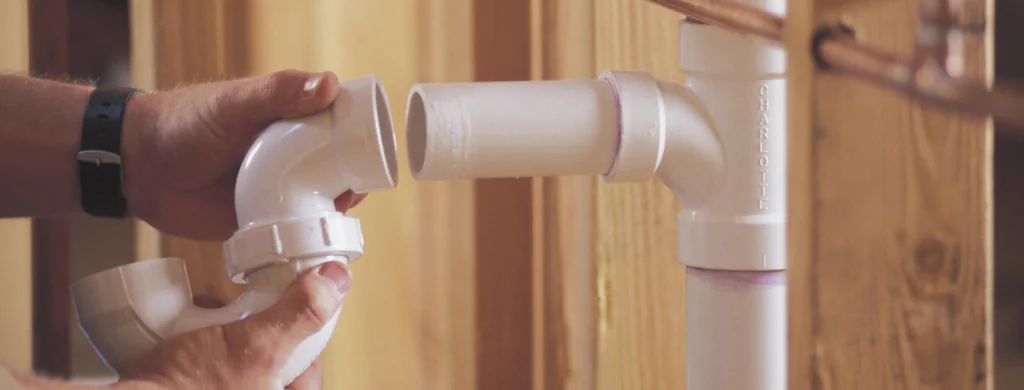
Making a plumbing loop vent requires the use of adapters and tees. Before you begin, decide on the type of pipe you’ll be using. First, choose the proper adaptor or tee. To connect two pipes for a loop vent, use an elbow-style adapter or tee. A straight-through design is preferable if your setup requires a longer run with more than two pipes. It gives you more flexibility when placing items in your plumbing system.
When choosing these adapters and tees, make sure the material (such as PVC) and size (such as 3/4′′) of your existing pipe are compatible. Examine the area for any gaps that could lead to leaks later. Once you’ve found the right ones, secure them. Then, trim any excess length with heavy-duty scissors or pneumatic shears. Be especially cautious if your pipes are thicker. The goal is to make a tight connection in order to keep everything flowing smoothly in your new plumbing loop vent system and to avoid surprises in your house drainage system. By following material and size rules and taking your time to achieve a solid plumbing loop vent, you can ensure perfect pipe connections and prevent water from escaping.
Step 5: Install End Cap
The final step of making a plumbing loop vent is to install an end cap. This seemingly small component is critical to the proper sealing and operation of the entire system. Precision in both size and fitting selection is critical here, as any mismatch may compromise airflow or cause ventilation issues. Before you begin installing the end cap, make sure that all other components in your house plumbing system diagram or basement drainage system have been properly installed and securely sealed.
To begin, use a pipe cutter or hacksaw to precisely cut the end cap into place. After cutting, generously apply silicone sealant around all four sides of the joint before firmly pushing it into place. Make a thorough inspection to ensure there are no gaps between the end cap and the surrounding pipes. If necessary, secure it with clamps or screws. A final inspection is required to ensure that the seal is leak-free around its entire circumference. If any problems arise, a little extra caulking can do wonders.
The end cap, when installed correctly, serves as a guard against airborne contaminants, ensuring proper airflow within the plumbing loop vent system. This process not only ensures the proper functioning of your home’s water supply but also reduces potential health hazards by preventing contaminated air from entering through ventilation system leaks, making it an essential step toward a dependable and effective plumbing loop vent.
Step 6: Connect Fittings with Primer and Cement
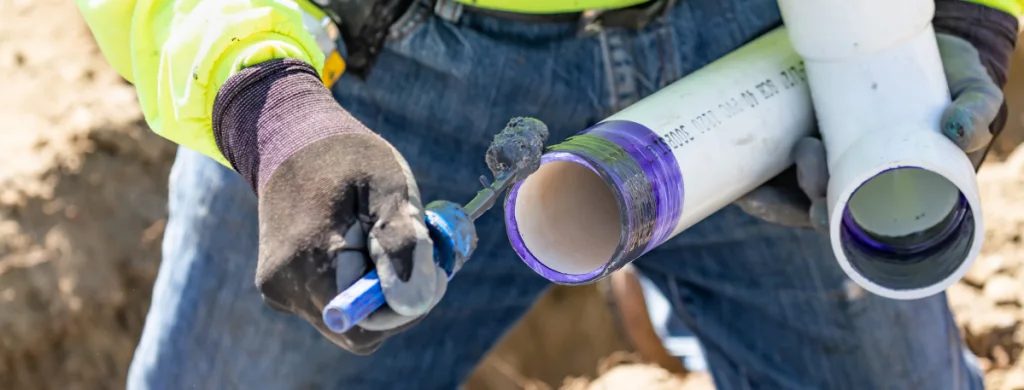
Creating a plumbing loop vent involves connecting fittings with primer and cement. These parts are essential for making a secure and leak-free connection between PVC or ABS pipe fittings. Remove any dust, dirt, grease, or debris from the surfaces involved and apply a consistent primer coat to ensure a clean connection.
The primer is used to prepare PVC or ABS pipe fittings for a strong bond. After priming, a solvent-based cement is applied to ensure a seamless connection. The cement ensures no gaps between fittings, forming a watertight seal when dry. This process is crucial for effective plastic pipe connections.
Apply cement to your plumbing loop vent, wait at least 30 minutes for it to dry completely, and then apply water pressure to ensure it is secure and free of leaks. This process ensures smooth operation and resistance to potential issues in your house plumbing system diagram or basement drainage layout.
Step 7: Test For Leaks and Functionality
As you wrap up the plumbing loop vent installation, testing is crucial during plumbing loop vent installation to ensure leak-free and optimal functionality. Turn on all sinks and toilets connected to the venting loop and monitor for leaks, as water streaming from fixtures may indicate potential issues in piping or joints.
After using the fixtures, thoroughly inspect the pipes for visible signs of water leakage, especially in areas where installation may have been imperfect. Before moving on to the next phase of testing, resolve any issues that have been identified.
Now, the final examination begins. Fill your sink or bathtub with warm water and inspect the vent stack for any potential air pressure issues to ensure a leak-free system. Look for bubbling sounds at the bottom and air streams along the surface. A thorough inspection ensures a leak-free system and identifies and corrects any problems that could affect the functionality of your plumbing loop vent.
Step 8: Insulate Vent Pipes
Insulating vent pipes is an important step in the process of making a plumbing loop vent. These pipes, whether vertical or horizontal, are critical components of the drainage system, allowing for air exchange and preventing energy loss. Insulating them, depending on their location within the house plumbing system diagram or basement drainage system, helps to reduce extreme temperature fluctuations, whether cold or hot.
The first step in starting this insulation journey is determining the best insulation material for your specific application. There are numerous options available, including fiberglass batts, foam boards, mineral wool, and spray foam. However, it is critical to consult local building codes, as certain materials may be required based on climate zones and pipe size/length.
Measure insulation for each pipe section, ensuring extra length around bends for thermal efficiency. Cut the insulation with a sharp knife or saw, secure it with adhesive caulk or mechanical fasteners, and seal all seams with adhesive sealant for best results.
A critical post-installation note: Double-check local codes to ensure safety and efficiency standards in your plumbing loop vent, as some areas require building inspector approval.
Maintenance Tips for Homemade Loop Vents
Maintaining your homemade loop vent is essential for a seamlessly functioning plumbing system. Here are some practical tips to ensure its longevity and efficiency:
- Routine Drain Cleaning: Regular cleaning of the main loop vent’s drain is crucial to prevent debris accumulation and blockages, as this can hinder air flow and reduce the effectiveness of the vent system in your house.
- Mechanical Vent Inspection: To prevent unexpected plumbing loop vent issues, it’s recommended to inspect the condition of a mechanical vent every two years, as mechanical vents may not provide clear failure indicators, requiring manual inspection.
- Garbage Disposal Tie-Ins: Ensure drain tie-ins near garbage disposals and keep them free of clogs to prevent backflow issues. This is particularly crucial if your plumbing loop vent is connected to a dishwasher, as issues could lead to larger system issues.
- Regular Inspection: Regularly inspect your homemade loop vent system for signs of wear, corrosion, or leaks to prevent minor issues from becoming major plumbing issues.
- Avoid Harsh Chemicals: Choose gentler, environmentally friendly cleaning solutions for your plumbing system to avoid damaging pipes and compromising the integrity of the loop vent.
- Examine Ventilation Paths: Regular inspections of ventilation paths, both vertical and horizontal, are crucial for proper vent system operation, ensuring adequate airflow and preventing potential issues.
Implementing these simple maintenance tips not only ensures the effectiveness of your homemade loop vent but also contributes to a smooth-running plumbing system, potentially saving you money in the long run.
Advantages of Having a Plumbing Loop Vent
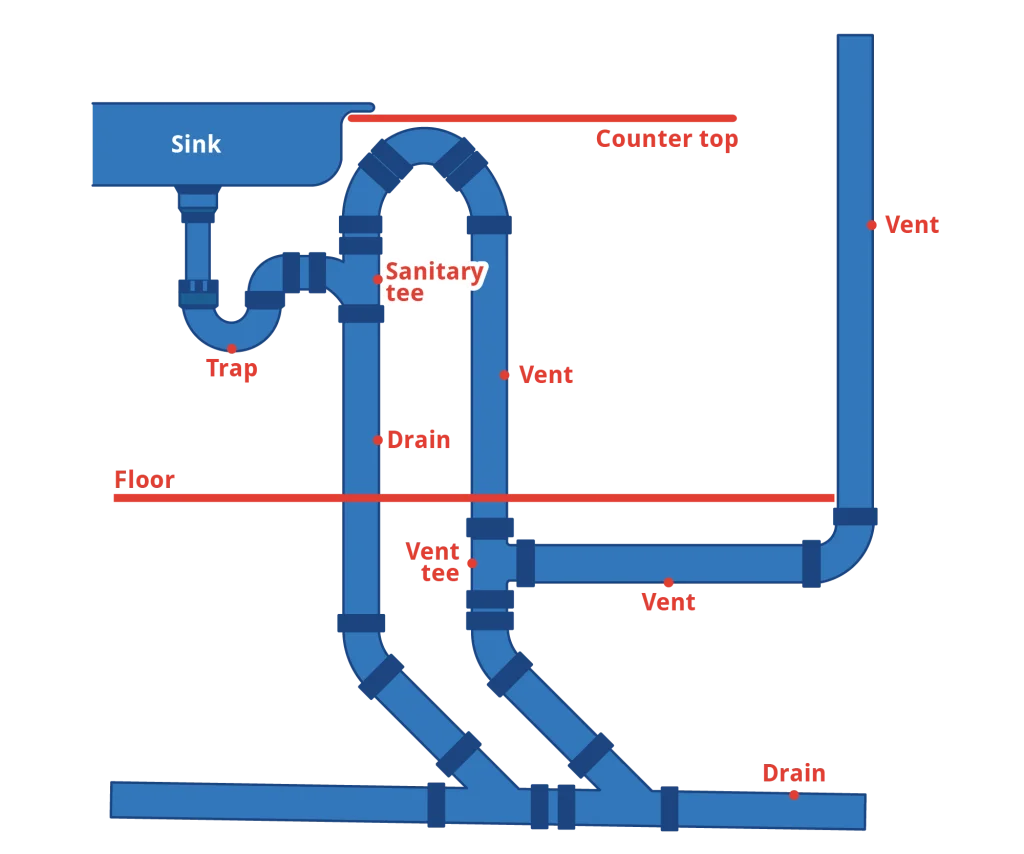
The plumbing loop vent is an important part of the house drainage system because it regulates air pressure and allows for optimal air circulation. It is strategically placed around the drainpipe to prevent negative pressure from hampering drain flow and trapping harmful gases. It is designed in such a way that fresh air is circulated through the dry vent while waste flows into the drainpipe and wet vent.
The Disadvantages of a Plumbing Loop Vent
Plumbing loop vents, while effective, have disadvantages. Installation can be difficult, particularly for those who are unfamiliar with plumbing ventilation systems that require access to a floor drain. Air gaps, for example, may only become apparent after the walls have been sealed. Precision is critical for horizontal vent pipes, which adds complexity, particularly on top floors with plumbing risers. Furthermore, when releasing air, loop vents can generate noise, which should be considered by those who prefer a quieter system. These disadvantages highlight the importance of expertise and the careful consideration that’s needed when installing plumbing loop vents in your home drainage system.
Alternatives For Homemade Loop Vents
While homemade loop vents are a viable option, alternatives such as an Air Admittance Valve (AAV) provide convenient plumbing ventilation options. The AAV, also known as a Studor Vent or Mini Vent, is a one-way mechanical valve that is installed directly at the plumbing fixture location. It enables efficient venting without the use of a larger venting system or a stack vent.
The AAV is a streamlined and localized solution that eliminates the complexities of a homemade loop vent. Its design allows for proper venting at the fixture level, making it a viable option in situations where a larger venting system would be difficult to install. Understanding these options expands your options when it comes to achieving effective venting within your home plumbing system. Consult with a professional plumber about installing an AAV in your home.